Step-by-Step Guide: How to Mount a Projector Like a Pro
Charting a course through the mounting process of a projector can be a challenging venture. Yet, our guide aims to clarify each step with precision, eliminating common concerns such as suitable location, equipment requirement, and intricacy of procedure. We'll traverse topics like how to mount a projector to the ceiling or confidently secure it on the wall, followed by imperative knowledge you need to possess before hanging the projector from your ceiling. This article will unfold opportunities to transform any corner of your abode into an immersive cinema!
How to Mount a Projector
Here's a step-by-step guide on how to mount a projector to a ceiling or wall:
How to Mount Projector to Ceiling
To ensure a dynamic home theater or conference room experience, you may decide to hang projector from ceiling for optimal viewing. Here's a complete guide on home theatre projector installation that sequentially explains every step you need to know.
Things You'll Need
For a seamless installation process, ensure you have all the following items ready:
- Projector
- Mount Kit
- Pencil
- Drill
- Safety goggles
- Tape Measurer
- Screwdriver
- Ladder or Step Ladder
- Wrench or Allen Wrench (depending on the mount)
- Drywall anchors (in case you are mounting to drywall)
- Stud finder (for installing into stud)
Step-by-Step Guide
Step 1: Identify the Optimal Placement of Your Projector to Your Screen
To start knowing how to mount projector to ceiling, you'll need to find an optimal position for the projector in relation to the screen. Below are some key factors you need to consider:
- Identify the Projector's Throw Distance:This is the optimum distance from the screen at which your projector should be positioned. The correct distance can typically be found in your projector's manual or manufacturer's website.
- Identify Projector's Vertical Offset:Before mounting a projector on the ceiling, note that some projectors need to be a certain height above or below the edge of the screen. Thus, always follow the manufacturer's recommendations.
- Pinpoint the Center Line of Your Projector Screen:Make sure that your projector is mounted directly in front of the midpoint of your screen for best results.
Step 2: Attach the Mount to the Projector
After determining the optimal position, let's go to the next step on how to mount a projector on the ceiling. Now you can attach the mount to the projector using the screws provided in your mount kit. Each projector brand has specific screw points; hence it's crucial to follow your mount instruction manual.
Step 3: Affix the Mount to the Ceiling
Let's now proceed to the next step on how to hang a projector from the ceiling. Once the mount is connected to the projector, you can now mount the assembly correctly onto the ceiling:
- Mark the drill points on the ceiling using a pencil.
- Drill pilot holes on the marked points (use safety goggles for protection).
- Carefully hold the mount assembly in place and screw into the ceiling.
- If you're drilling into drywall, use drywall anchors.
Step 4: Wiring Your Projector
Once you have your projector mounted, we're down to the last few steps on how to mount a ceiling projector. At this step, you must consider the best way to hide the wires for a cleaner look. You might want to drill a hole in your ceiling and run cables through it, or use conduit or cable raceways to conceal them.
Step 5: Aligning Your Projector
And for the last step on hanging a projector from ceiling—calibrate your projector to the screen. Use the adjusters on the mount to align the projector until the image is perfectly aligned with your screen.
By following these steps, you should be able to practice the best way to mount a projector successfully. The process might differ slightly based on the model of your projector and the type of ceiling you have. Always remember that the best way to mount a projector is to ensure its safety and maintain your space's cleanliness and aesthetics.
How to Mount a Projector on the Wall
Gather the Necessary Materials
In order to know how to mount a projector without drilling, you will need the following items:
- Projector
- Wall mount or shelf intended for projectors
- Adhesive strips and hooks or a no-drill mounting solution
- Tape measure
- Level
- Pencil or other marking tool
- Stud finder (optional)
Step-by-Step Guide
Step 1: Choose the Optimal Location for Your Projector
Before mounting your projector, decide where on the wall it will provide the best image quality and viewing experience. Consider the following factors:
- Distance from the screen or wall
- Height and angle requirements for optimum screen projection
- Availability of a power source and cable management options
- Seating arrangement and overall layout of the room
Step 2: Attach the Mount or Shelf to the Wall
Now that you've determined the ideal location for your projector, follow these steps to learn how to mount a projector on the wall:
Option A: Adhesive Strips and Hooks
- Clean wall and allow it to dry.
- Mark designated mounting points on the wall.
- Follow the manufacturer's instructions to adhere adhesive strips to hooks.
- Firmly press hooks onto the marked points on the wall, ensuring they're level and properly aligned.
- Allow adhesive to set for the recommended time before proceeding.
Option B: No-Drill Wall Mount or Shelf
- Prepare the mount or shelf based on the manufacturer's instructions.
- When anchoring to a wall, use a stud finder to locate a wall stud. If no stud is found, use appropriate wall anchors.
- Place mount/shelf and mark desired mounting points on the wall.
- As per instructions, secure the mount/shelf using adhesive or pressure-based mechanisms; no drills are required.
Step 3: Secure the Projector to the Mount or Shelf
Once the mount or shelf is attached to the wall, carefully place your projector onto it, ensuring it is secure and stable. Follow the manufacturer's guidelines/instructions on how to install a projector and the proper way of securing the device, which may include tightening screws or clamps.
Step 4: Connect and Test the Projector
After mounting your projector, connect the appropriate power and video cables to your mounted projector. Adjust image features accordingly, including focus, zoom, lens shift, and keystone correction. Carry out a test run to guarantee proper alignment and satisfactory image quality.
What Should You Know Before Hang Projector from Ceiling
Before executing the steps mentioned above on how to install projector on ceiling, consider these important points:
- Projector Compatibility:Ensure your projector is compatible with ceiling mounting by checking its manual or specification sheet.
- Ceiling Type & Structure:Determine the structure and material of your ceiling to choose the appropriate mounting hardware and location.
- Mounting Bracket:Select a sturdy, compatible mounting bracket for your projector to ensure proper support and safety.
- Throw Distance & Screen Size:Calculate the throw distance and screen size that your projector requires based on its specifications and desired image quality.
- Cable Management:Plan for cable management, including purchasing the necessary extension cords, HDMI cables, and conduit materials.
- Ventilation & Heat Dissipation:Ensure proper ventilation for your projector to prevent overheating and extend its lifespan.
- Angle & Lens Shift:Adjustments to the projector's angle and lens shift might be necessary to align the image accurately on your viewing screen. Consider this when planning the ceiling mount placement.
- Safety & Professional Guidance:Make sure to follow safety precautions, read the projector manual, and seek professional guidance if needed.
Looking for a reliable and high-quality projector? Nebula has a lot to offer just for you!
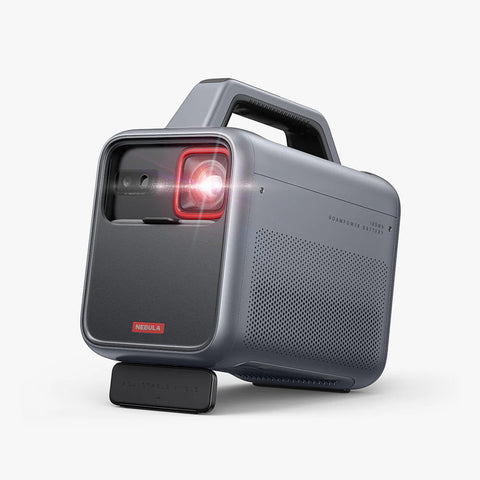
- Capsule 3 Laser Projector
The Capsule 3 Laser Projector, weighing just 2.1 lb, packs a highly-portable design that's 90% smaller than its competitors. It boasts 300 ANSI lumens laser brightness which results in 1080p HD clarity, an 8W Dolby speaker for cinematic audio, and the versatility of Android TV 11.0 compatibility with Netflix. Additionally, its robust 52Wh battery guarantees 2.5 hours of uninterrupted video playback.

- Cosmos Laser 4K Projector
The Cosmos Laser 4K Projector boasts 2200 ANSI lumens for brilliant visuals, even in lit rooms, with striking 4K UHD resolution. Its Intelligent Environment Adaptation (IEA) technology enables effortless setup, while its portable design lets you transform any room into a theater. Immerse in a rich, powerful audio experience thanks to dual tweeters and speakers, and choose from 400,000+ viewing options through Android TV 10.0.

- Mars 3 Outdoor Projector
Discover the Mars 3 Outdoor Projector, a powerful and immersive device offering 1000 ANSI Lumens brightness, 1080p resolution, and up to a 200-inch screen for a cinema-like experience in any setting. Featuring Android TV 11.0 compatibility, Chromecast, 5-hour playtime, and built-in 40W speaker with Dolby Digital Plus, this projector is designed for outdoor use with IPX3 water resistance, drop and dust resistance, and a carry handle. Enjoy easy setup and intelligent environment adaptation for hassle-free entertainment.
Conclusion
Conquering the task of how to mount a projector, be it on a ceiling or wall, opens up a world of cinematic possibilities. With the knowledge you've gained, transforming rainy days into your personalized movie theater magic or turning ordinary business presentations into an unforgettable visual experience, now all lies at your fingertips. So what are you waiting for? Mount your projector, sit back, grab some popcorn, and surrender to the magic of spectacular visuals today!
FAQ
Below are some frequently asked questions about how to mount a projector.
Can I use a wall mount shelf for projector?
Yes, you can use a wall mount shelf for a projector if the shelf is sturdy, well-anchored, and positioned at an appropriate distance from the projection surface. It should also allow for proper ventilation, alignment adjustments, and cable management.
Why ceiling mount a projector?
Ceiling mounting a projector is popular because it offers an unobstructed and secured installation, often resulting in an optimal viewing experience. It keeps the projector up and away from people or objects, minimizing the risk of accidental damage or image distortion caused by people passing through the projected image.
Can all projectors be ceiling mounted?
While most projectors can be ceiling mounted, it's important to check the manufacturer's specifications and limitations, as some projector models may require specific mounts or may not be designed for ceiling suspension. Always ensure you use the appropriate mounting brackets and follow the installation guidelines.